
Car AC Refrigerant Leak Repair: Stepwise Repair Process
Is your car’s AC not cooling like it used to? You’re not alone. Many drivers face this issue, especially during hot summer days when you need cold air the most. A car AC refrigerant leak repair may be the solution you need to restore comfort. When refrigerant leaks out, your AC can’t cool properly, and ignoring it can lead to expensive damage later on.
In this blog post, we’ll walk you through the step-by-step process of car AC refrigerant leak repair, explaining what causes leaks, how to fix them, and when it’s time to see a professional. For lasting results and a fully restored cooling system, professional auto repair Houston ensures your car’s AC runs efficiently and leak-free.
If you’re searching for ‘auto repair near me,’ we’re here to help — book your service today.
What Is a Refrigerant Leak?
A refrigerant leak occurs when the cooling agent inside your car’s air conditioning (AC) system escapes through cracks, worn seals, or damaged components. Refrigerant is essential for absorbing heat and keeping your cabin cool. When it leaks, your AC loses efficiency, blowing warm or less cool air instead of cold.
Sometimes, drivers notice a strange odor and wonder what a refrigerant leak smells like. In many cases, it can have a faintly sweet, chemical, or chloroform-like scent, though small leaks may have no noticeable smell. Detecting such odors, along with reduced cooling, hissing sounds, or oily residue around AC parts, can signal a need to repair refrigerant leaks that requires professional inspection and repair.
Car AC Leak Check: Signs and Causes
Detecting a car AC leak early can save you from expensive repairs and poor cooling performance. Start by turning on your car’s AC and checking if the air blowing from the vents feels less cool than usual. Listen closely for any hissing or bubbling sounds; these often indicate escaping refrigerant gas.
Next, inspect the AC components like hoses, fittings, and the compressor for oily residue or damp spots, as refrigerant often leaks out mixed with lubricating oil. During your inspection, it’s helpful to know what typically causes these leaks.
Common causes of car AC refrigerant leaks include:
- Worn-out rubber seals, hoses, or O-rings
- Corrosion in the condenser or evaporator
- Loose fittings or damaged service valves
- Road debris or minor collision damage
- Neglected AC maintenance or infrequent inspections
Understanding these signs and causes helps you identify issues early, keeping your car’s cooling system efficient and reliable.
How to Fix a Refrigerant Leak in a Car: Step-by-Step
Now, let’s go through the process step by step to ensure your car’s AC system is repaired correctly and runs efficiently afterward. Each stage plays a crucial role, from identifying the leak to recharging and testing the system. Skipping or rushing any step can lead to recurring leaks or reduced cooling performance.
Make sure to use the proper tools and safety procedures, and if you’re not certified to handle refrigerants, it’s best to let a professional technician manage the recovery and recharging process for long-lasting, efficient results in your AC system leak repair.
Step 1: Inspect the AC System for Visible Damage
Begin with a careful visual inspection of your AC components. Look for signs of oil residue, cracks, or damage near the fittings, hoses, and condenser. If you notice any green or yellow dye stains, that usually indicates a vehicle AC leak.
If no visible damage is found, use a UV dye or an electronic leak detector to locate hidden leaks. This step helps you identify exactly where the refrigerant is escaping before you move on to the actual repair.
Step 2: Safely Discharge the AC System
Once the leak has been identified, the next step is to discharge the system. It’s very important to do this safely and responsibly. Refrigerants should never be released into the air because it’s harmful to the environment.
According to the U.S. Environmental Protection Agency (EPA),
“Technicians must use certified recovery equipment to capture refrigerants. Vent release of refrigerants into the atmosphere is illegal under Section 608 of the Clean Air Act.”
This means only EPA Section 609–certified technicians are legally allowed to recover or recharge refrigerants. If you don’t have the tools or certification for this, it’s best to have a professional handle this part of the repair, especially when dealing with a freon leak in the AC system.
Step 3: Replace the Damaged Components
After discharging, replace any parts that caused or were affected by the leak. These may include O-rings, seals, hoses, or even larger components like the condenser or evaporator.
When installing new parts, make sure all fittings are tight and properly sealed. Using a leak repair kit or OEM-quality parts will help prevent future leaks and improve the durability of your AC system.
Step 4: Vacuum the System
Once the damaged components are replaced, connect a vacuum pump to the AC system. The goal is to remove any air and moisture that may have entered during the repair. Moisture inside the system can freeze and block the refrigerant flow, leading to poor cooling performance and requiring another air conditioner coolant leak repair.
Run the vacuum pump for at least 30 to 45 minutes to ensure the system is completely dry and ready for recharging.
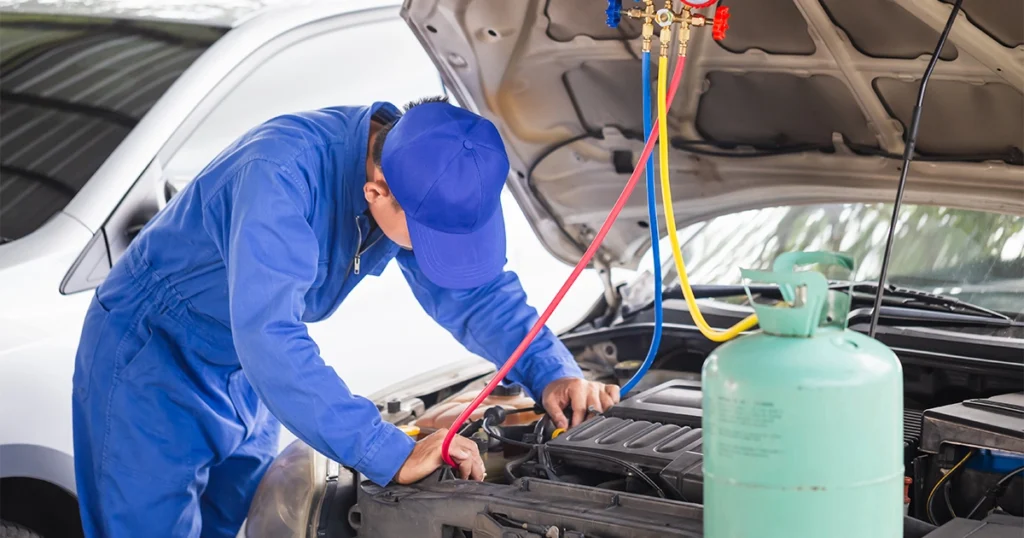
Step 5: Recharge the System with Refrigerant
After vacuuming, it’s time to recharge your system with the correct type and amount of refrigerant. This step restores the cooling ability of your AC. Always check your car’s manual or service label for the specific refrigerant type and capacity.
Use a manifold gauge set to fill the refrigerant carefully and evenly. Overcharging or undercharging can reduce cooling performance, so be precise; this is critical for any air conditioning leaking in a car scenario.
Step 6: Test the System for Leaks and Performance
Finally, once the system is recharged, test it for both performance and potential leaks. Run the AC at full blast and check if cold air is blowing consistently from the vents.
Use the leak detector one more time to confirm that no refrigerant is escaping. If everything checks out, your car’s AC refrigerant leak repair is complete. The system should now be sealed, efficient, and ready to keep you cool.
How to Prevent Future AC Refrigerant Leaks
Prevention goes a long way in keeping your car’s AC working like new. Schedule regular AC service checks at least once a year. Replace worn seals or O-rings early before they fail completely. Avoid overcharging the refrigerant, as it can increase system pressure and cause leaks.
Parking in shaded areas can also protect rubber parts from heat damage. Simple car AC maintenance tips like these can help you prevent AC refrigerant leaks and extend your system’s life.
Key Takeaways
- Schedule annual AC service checks to catch early issues.
- Replace worn seals or O-rings before they cause leaks.
- Avoid overcharging refrigerants to prevent excess pressure.
- Park in shaded areas to reduce heat damage to rubber parts.
- Follow simple maintenance tips to extend your AC system’s life.
Keep Your Car’s AC Running Smoothly
Now you understand the step-by-step process of car AC refrigerant leak repair from identifying leaks to fixing and preventing them. With the right care and maintenance, you can keep your car’s cooling system running at its best.
If your AC isn’t performing as it should, don’t wait until the heat becomes unbearable. At Eric’s Car Care, our ASE-certified technicians expertly diagnose and repair all vehicle AC issues. With over 50 years of experience, you can trust that your car is in expert hands. Contact us today for professional car AC leak repair and maintenance service. We’ll help you stay cool, comfortable, and confident on every drive.