
When it comes to car maintenance, one of the most critical components you should pay attention to is your brake system. Among all the brake parts, the brake caliper plays a vital role in ensuring your car stops when you need it most. Replacing a brake caliper may sound intimidating, but with a little guidance (and some elbow grease), you can absolutely do it yourself!
In this blog, we’ll walk you through the entire process of replacing a brake caliper. We’ll cover everything from tools you’ll need to safety measures, all while keeping things light and humorous. After all, if you’re going to get your hands dirty, you might as well have a good time doing it. And if DIY isn’t your thing, no worries, your local auto repair Houston can handle brake repairs safely and efficiently.
If you’re searching for ‘auto repair near me,’ we’re here to help — book your service today.
How Brake Caliper work?
A brake caliper is a crucial part of a disc brake system. It houses the brake pads and uses hydraulic pressure to press them against the spinning brake rotor. When you press the brake pedal, brake fluid flows from the master cylinder to the caliper, forcing the pistons inside it to move.
As the pistons push the brake pads inward, they clamp onto the rotor, creating friction that slows down or stops the vehicle. Once you release the pedal, the pressure reduces, and the caliper loosens its grip, allowing the wheels to spin freely again.
Signs You Need to Replace Your Brake Caliper
How can you tell if your brake caliper needs replacing? Here are some telltale signs:
- Pulling to One Side: If your car veers left or right when you brake, a stuck caliper might be the culprit.
- Leaking Brake Fluid: Notice a puddle of fluid near your wheel? It could be brake fluid leaking from a faulty caliper.
- Reduced Braking Power: Are you stomping on the brake pedal like it owes you money? A damaged caliper might be to blame.
- Squeaking or Grinding Noises: No, it’s not your car singing. Strange noises could mean caliper trouble.
If you’re noticing any of these symptoms, it’s time to schedule professional brake repair services to stay safe on the road and avoid further damage.
Tools You’ll Need for the Job
Replacing a brake caliper is impossible without the right tools. Here’s your checklist:
- Jack and Jack Stands: Safety first! You’ll need these to elevate your car.
- Socket Wrench Set: For removing bolts and nuts.
- Brake Fluid: You’ll need to bleed the brakes after installation.
- C-Clamp: To compress the brake piston.
- Shop Towels: Things will get messy, trust me.
Safety First: Preparing for the Replacement
Before diving into the nitty-gritty, let’s talk safety. Replacing a brake caliper isn’t rocket science, but it does require some precautions:
- Always park your car on a flat surface and engage the parking brake.
- Use jack stands to secure the car; never trust just the jack.
- Wear protective gloves and safety goggles to avoid injuries.
You don’t want to end up with more than just a busted caliper, like a trip to the ER!
Step 1: Loosen the Lug Nuts
First things first: loosen the lug nuts on the wheel where you’ll be replacing the caliper. Don’t remove them completely just yet, just loosen them enough so you can easily remove the wheel once the car is lifted.
Pro Tip: Use a cross wrench or an impact wrench for extra leverage. It’s like arm day at the gym, but more rewarding.
Step 2: Lift the Car Safely
Using your jack, lift the car until the wheel is off the ground. Secure the car with jack stands to prevent any accidents. Remember, safety is the name of the game here.
Double-check that the car is stable before proceeding. A wobbly car is no one’s friend.
Step 3: Remove the Wheel
Now that your car is safely elevated, remove the loosened lug nuts and take off the wheel. Place it aside where it won’t roll away, because chasing after your car wheel isn’t part of this guide.
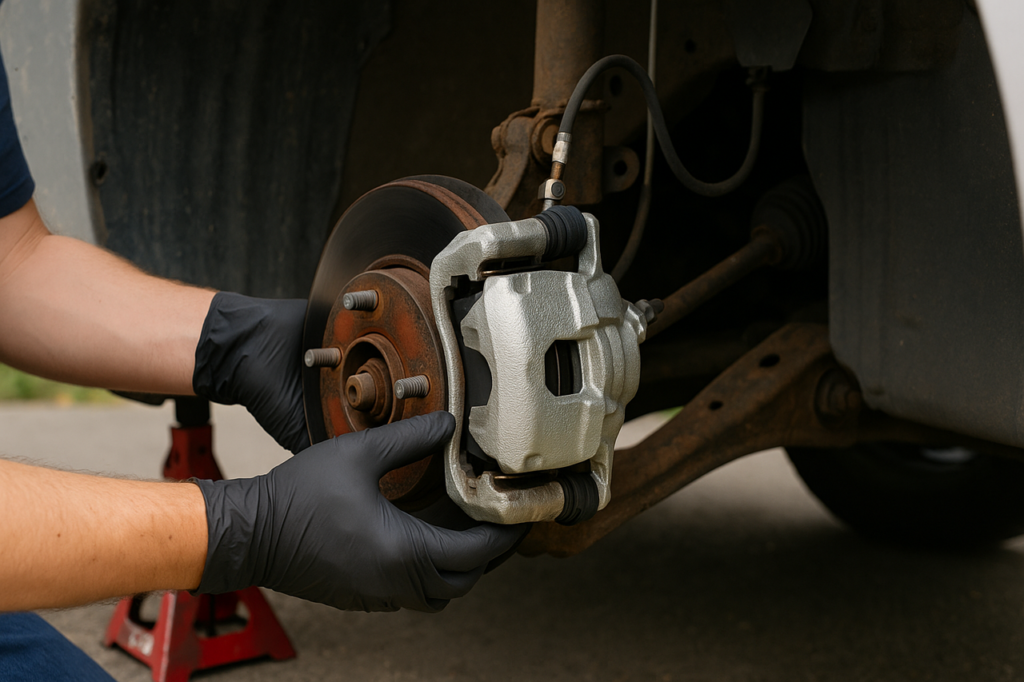
Step 4: Remove the Old Brake Caliper
Here’s where the magic happens:
- Locate the brake caliper and inspect it.
- Use your socket wrench to loosen and remove the bolts holding the caliper in place.
- Carefully slide the caliper off the rotor. If it’s stuck, a bit of gentle persuasion (read: wiggling) should do the trick.
Pro Tip: Hang the caliper using a bungee cord or wire so it doesn’t dangle and damage the brake hose.
Step 5: Install the New Brake Caliper
Out with the old, in with the new!
- Slide the new caliper onto the rotor, making sure it’s aligned properly.
- Secure it in place by tightening the bolts. Don’t overtighten, as this could damage the caliper.
- Reattach the brake hose to the new caliper and tighten it with a wrench.
Step 6: Bleed the Brakes
Now comes the slightly messy part: bleeding the brakes. This step ensures there’s no air in the brake lines, which could affect performance.
- Have a friend pump the brake pedal while you open the bleeder valve on the caliper.
- Let the brake fluid flow until there are no air bubbles.
- Tighten the valve and repeat the process for all brakes, if necessary.
Step 7: Reattach the Wheel
You’re almost there! Place the wheel back onto the hub and screw in the lug nuts by hand. Once the car is lowered, use a torque wrench to tighten the lug nuts to the manufacturer’s specifications.
Step 8: Test Drive Your Car
Before you hit the open road, take your car for a test drive in a safe area. Pay attention to how the brakes feel. If everything is smooth, congratulations, you did it!
If the brakes feel off, recheck your work or consult a professional mechanic.
Why You Should Visit Eric’s Car Care for Brake Services
Replacing a brake caliper on your own is a rewarding experience, but let’s be honest, it’s not for everyone. If you’d rather leave it to the pros, Eric’s Car Care is your go-to solution.
With a team of certified mechanics and years of experience, Eric’s Car Care ensures your brake system is in tip-top shape. Plus, they use top-quality parts and offer a customer-friendly experience that makes car care stress-free.
Visit Eric’s Car Care today or book an appointment by calling at 713-667-9293 and enjoy peace of mind knowing your brakes are in expert hands!