
A fuel filter might be a small part of your car, but it plays a big role in keeping your engine happy and healthy. Replacing your fuel filter is not just a smart move; it’s essential for long-term performance, fuel efficiency, and avoiding costly repairs. If you’re ready to roll up your sleeves, follow this guide for a step-by-step breakdown on fuel filter replacement. Or, if you’d rather leave it to the pros, visit our auto repair Houston for expert service. Let’s dive in!
If you’re searching for ‘auto repair near me,’ we’re here to help — book your service today.
Why Replace the Fuel Filter
Replacing the fuel filter is essential to keep your engine running smoothly. Over time, the filter collects dirt, rust, and debris from the fuel, which can clog the system and reduce engine performance. A clogged filter restricts fuel flow, leading to poor acceleration, engine misfires, or even stalling.
Regular fuel filter replacement helps protect your fuel injectors and engine components from damage. It ensures clean fuel reaches the engine, improving efficiency and extending the life of your vehicle. Skipping this maintenance can lead to costly repairs and reduced fuel economy. Regular fuel system service can help prevent these issues and keep your engine in top shape.
How Often Should You Replace Your Fuel Filter?
Here’s the million-dollar question: “When should I change my fuel filter?” While every car is different, most manufacturers recommend replacing the fuel filter every 20,000 to 40,000 miles.
If you notice reduced fuel efficiency, trouble starting your car, or sputtering while driving, it might be time to check the filter. And hey, if you can’t remember the last time you replaced it, that’s probably a good sign it’s overdue.
Tools You’ll Need for a Fuel Filter Replacement
Before you dive in, let’s gather your tools. Trust us, being prepared will save you from mid-job frustration!
Fuel Filter Replacement Tool Checklist
- New Fuel Filter (make sure it’s compatible with your vehicle)
- Safety gloves and goggles
- A flathead screwdriver
- A wrench or socket set
- Fuel line disconnect tool (for some vehicles)
- A container to catch fuel drips
- Rags or towels
Now that you’re armed and ready, let’s get this show on the road!
Step 1: Safety First!
Replacing a fuel filter may sound straightforward, but you’re dealing with fuel, a flammable liquid. Here are a few safety tips to keep in mind:
- Work in a well-ventilated area or outdoors.
- Disconnect the battery to avoid any accidental sparks.
- Wear safety goggles and gloves to protect your eyes and skin.
- Keep a fire extinguisher nearby, just in case.
Remember: safety isn’t just a suggestion, it’s a necessity.
Step 2: Relieve Fuel Pressure
Fuel systems are pressurized, so you’ll need to release the pressure before removing the filter. Here’s how:
- Start by locating your vehicle’s fuel pump fuse or relay (check the owner’s manual for its location).
- Remove the fuse or relay, then start your engine. Let it run until it stalls; this ensures there’s no pressure in the fuel lines.
- Turn off the ignition and replace the fuse or relay.
This step prevents fuel from spraying everywhere when you disconnect the lines.
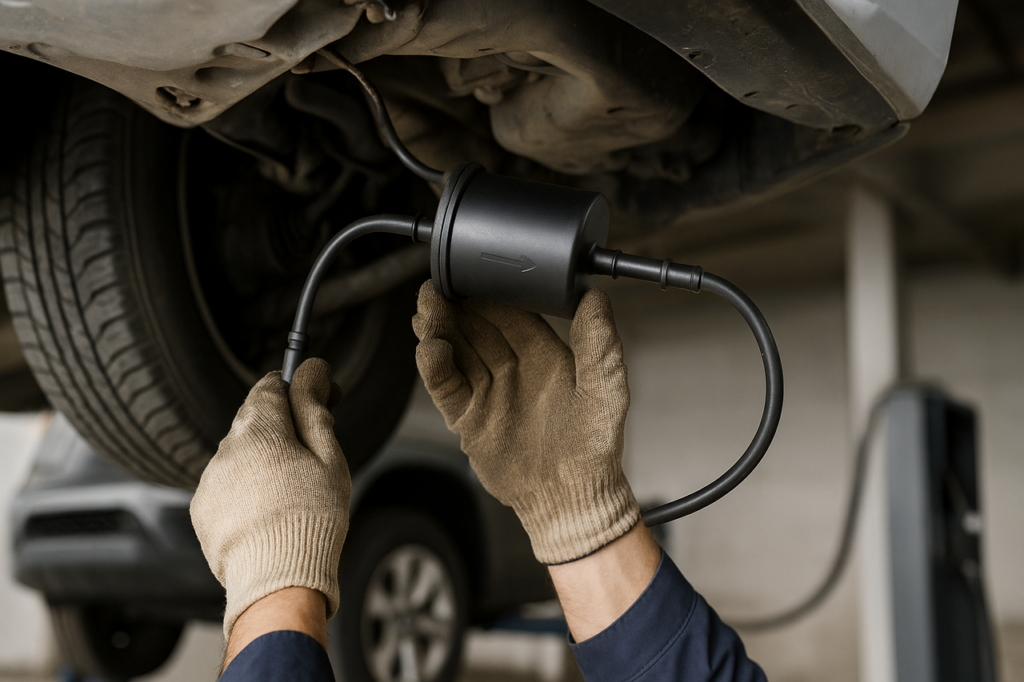
Step 3: Locate the Fuel Filter
Depending on your car, the fuel filter can be in one of two places:
- Under the hood: Near the engine or along the fuel line.
- Under the car: Near the fuel tank or along the chassis.
Refer to your car’s manual to pinpoint the exact location.
Pro tip: If it’s under the car, grab a creeper or some cardboard to lie on.
Step 4: Remove the Old Fuel Filter
Now for the fun part, getting your hands dirty! Follow these steps:
- Use your wrench or fuel line disconnect tool to loosen the clamps or fittings securing the fuel filter.
- Carefully disconnect the fuel lines. Be ready with a container to catch any dripping fuel.
- Remove the old fuel filter and set it aside.
Quick tip: Take a picture of the setup before removing the filter. This will help you remember how to install the new one.
Step 5: Install the New Fuel Filter
Out with the old, in with the new! Here’s how to install your shiny new fuel filter:
- Ensure the arrow on the filter points in the direction of fuel flow (toward the engine).
- Attach the fuel lines to the new filter and tighten the clamps or fittings securely.
- Double-check that everything is snug; loose connections can lead to leaks.
Pat yourself on the back, you’re halfway there!
Step 6: Test for Leaks
If the engine still runs rough or you’re noticing performance issues even after replacing the fuel filter, the problem may lie deeper within the fuel or ignition systems. In such cases, it’s best to have your car checked by professionals. At Eric’s Car Care, our expert team offers thorough engine repair services to diagnose and fix the root cause, ensuring your vehicle gets back to peak performance safely and efficiently.
Fuel System Maintenance Tips
Now that your fuel filter is in top shape, it’s time to focus on keeping the entire fuel system running efficiently. Here are some essential maintenance tips:
- Use high-quality fuel to minimize the buildup of contaminants and protect delicate engine components. Lower-grade fuels can leave behind residues that clog injectors and reduce performance.
- Add a fuel system cleaner every 3,000 miles to help break down carbon deposits and keep your injectors spraying evenly. It’s an easy, affordable way to maintain peak engine performance.
- Replace your air filter regularly; a clogged air filter can throw off the air-fuel ratio and put added strain on your fuel system. Clean air helps your engine burn fuel more efficiently.
Need Help? Visit Eric’s Car Care!
Not feeling confident about tackling this DIY project? No worries, Eric’s Car Care has got your back! Their expert mechanics can replace your fuel filter and handle all your car maintenance needs. With top-notch service and fair pricing, you can trust Eric’s Car Care to keep your car in tip-top shape.
Ready to give your car the care it deserves? Visit Eric’s Car Care today or book an appointment by calling 713-667-9293 and let the pros handle it!